
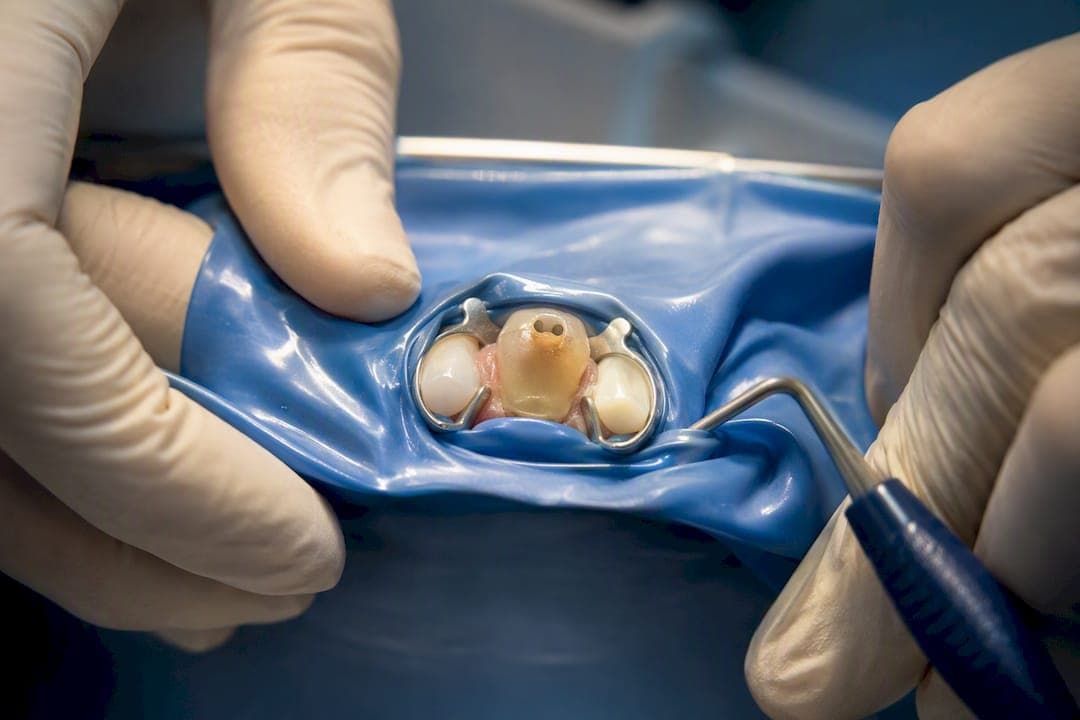
Internal tooth bleaching is often an effective, conservative way to whiten a dark, root canal-treated tooth, especially when the discoloration comes from old trauma rather than metallic staining. It preserves far more healthy structure than a crown or veneer, though it carries a small risk of external cervical resorption that a careful clinician manages through technique. If your root canal is failing or the stain looks metallic, other options usually work better.
TL;DR:
- Sodium perborate mixed with water remains the safest bleaching agent with the lowest risk of external cervical resorption, especially when used with a solid barrier.
- The success of internal bleaching heavily depends on proper technique, including rubber dam isolation, adequate barrier placement, and avoiding heat during activation.
- Results tend to last several years if the final restoration remains sealed and well-maintained, but relapse often occurs from restoration breakdown or external staining.
- Bleaching is ineffective against metallic stains or teeth with poor root canal seals, requiring alternative treatments like veneers, crowns, or retreatment.
- Careful case selection and adherence to safety protocols significantly reduce the risk of complications such as external resorption.
Table of Contents
- What Internal Tooth Bleaching Is and When It's Indicated
- How Bleaching Works and Which Agents Dentists Use
- The Main Techniques, Step by Step
- What to Expect: Preparation, Visits, and Follow-Up
- Weighing the Risks Against How Clinicians Control Them
- How Long Results Last and What Affects the Outcome
- When to Skip Bleaching and Consider Other Options
- How CWD Dental Group Approaches Internal Bleaching
- What to Bring to Your Consultation
- Ready to Whiten a Dark Root Canal Tooth?
- Sources
What Internal Tooth Bleaching Is and When It's Indicated
Internal tooth bleaching, sometimes called intracoronal bleaching or endodontic bleaching, whitens a nonvital tooth from the inside out. A dentist opens the existing access cavity, places a bleaching agent inside the pulp chamber, and seals it, letting oxidation lighten the dentin from within rather than treating just the enamel surface. It's a fundamentally different process than the whitening trays or in-office gels used on living teeth, because the discoloration here starts deep inside the tooth, not on the surface.
Most candidates are teeth that went dark after root canal treatment. The common causes include:
- Blood breakdown products left behind after trauma or pulp necrosis, which seep into dentin tubules and darken from within
- Residual pulp tissue or debris not fully removed during endodontic treatment
- Older root canal materials, including certain sealers, that discolor over time
- Internal hemorrhage following an injury, even years before the tooth visibly darkens
Good candidates have a well-sealed, healthy-looking root canal, intact tooth structure, and grey or brownish discoloration tied to trauma. Poor candidates include teeth with a failing or poorly sealed root canal, active infection, or extensive structural loss, since bleaching won't fix an underlying endodontic problem, and a conservative cosmetic approach only makes sense once that foundation is solid.
How Bleaching Works and Which Agents Dentists Use
The chemistry is straightforward oxidation. Peroxide breaks down into reactive oxygen molecules that penetrate dentin and break apart the pigmented compounds causing discoloration. Given enough time and the right concentration, this process reverses much of the staining that trauma or old canal materials leave behind.
Three agents dominate clinical practice, each with a different balance of speed and safety:
- Sodium perborate mixed with water: the safest default. It's slower than peroxide alone but carries the lowest resorption risk when used as a paste.
- Hydrogen peroxide: faster and more effective at higher concentrations, but that same strength raises safety concerns if it leaks past the seal.
- Carbamide peroxide: a gentler, slower-release alternative sometimes used for extended walking bleach protocols.
Sodium perborate mixed with water meaningfully reduces the risk of external cervical resorption compared with high-concentration hydrogen peroxide, which has shown up repeatedly in long-term follow-up studies as the riskier choice. That's why many dentists reach for perborate first and reserve stronger peroxide mixes for cases where speed genuinely matters.
None of this works safely without an orifice barrier, a physical seal placed over the gutta-percha before the bleaching paste goes in. Without it, the agent can diffuse down toward the periodontal ligament and root surface, which is exactly the pathway blamed for resorption. The barrier is not optional. It's the single step that separates a low-risk procedure from a risky one.
The Main Techniques, Step by Step
Three techniques cover almost every case a dentist will encounter. Here's what actually happens during each.
- Walking bleach. The dentist isolates the tooth, removes gutta-percha down to a safe depth below the gumline, places a barrier, then packs a sodium perborate and water paste into the pulp chamber and seals it with a temporary filling. You come back roughly once a week so the dentist can check shade progress and refresh the paste. Most cases need several visits before reaching the target shade.
- Inside/outside bleaching. This combines the internal paste with a take-home whitening tray worn over the outside of the tooth, which can speed results considerably. It demands more from the patient: the access cavity stays temporarily sealed between wear, and leaving it open invites bacterial contamination, so compliance with the dentist's instructions matters here more than with walking bleach.
- In-office bleaching. A higher-concentration agent is applied directly and left for a shorter, single session under close supervision. It moves faster but usually still needs a definitive restoration placed afterward once the shade stabilizes.
Before any of these begin, a dentist runs through a short but non-negotiable checklist: rubber dam isolation to keep the mouth dry and controlled, removal of coronal gutta-percha to the recommended depth, and barrier placement to protect the root. Skipping any of these three steps is where complications start.
Pro Tip: Ask your dentist whether they use chemical activation alone or add a curing light. Case-based evidence suggests light activation offers no proven benefit over chemical activation by itself, so a light shouldn't add cost to your treatment plan.
What to Expect: Preparation, Visits, and Follow-Up
A typical walking bleach case runs two to four appointments, each about 30 to 45 minutes, spaced roughly a week apart so the dentist can track color change and refresh the paste if needed. In-office sessions run longer in a single visit but usually need fewer follow-ups.
Some mild sensitivity to temperature is normal for a day or two after each appointment. What isn't normal: persistent pain, swelling, or sensitivity that worsens rather than fades, which means you should call your dentist rather than wait it out.
Expect a baseline X-ray before treatment starts and periodic follow-up imaging afterward. This is not an optional formality. Radiographic monitoring after intracoronal bleaching helps catch early external resorption before it becomes a bigger problem, and success depends heavily on how carefully the case was planned from the first visit.
Once the tooth reaches its target shade, plan for:
- A short waiting period before definitive bonding, since freshly bleached dentin can temporarily reduce bond strength
- A permanent restoration to seal the access cavity for good
- A follow-up X-ray schedule your dentist sets based on your specific case history
Weighing the Risks Against How Clinicians Control Them
External cervical resorption is the complication that makes internal bleaching worth taking seriously rather than treating as a routine cosmetic fix. It happens when bleaching agent, heat, or both reach the periodontal ligament through gaps in the seal or through microscopic channels in the root, triggering an inflammatory resorptive process at the neck of the tooth. Trauma history, high-concentration peroxide, and heat application during treatment all raise the odds.
Long-term follow-up studies tie resorption risk most closely to agent concentration and barrier quality, not to the bleaching technique itself. A tooth bleached carefully with sodium perborate and a solid barrier carries a meaningfully different risk profile than one treated with strong peroxide and a thin or absent seal.
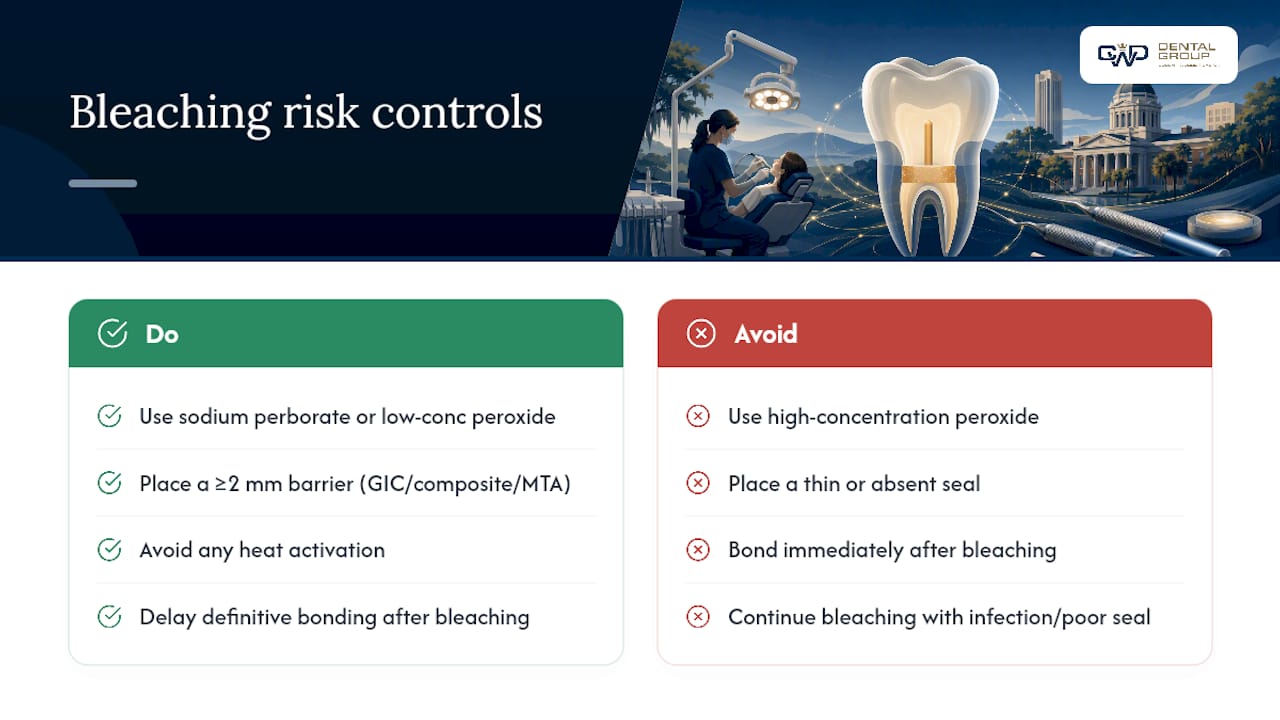
Clinicians manage this risk through a short list of deliberate choices: favoring sodium perborate with water or lower-concentration peroxide over aggressive high-strength mixes, placing a barrier at least 2 millimeters thick using glass ionomer, composite, or MTA, and avoiding any heat source during activation.
Freshly bleached dentin also bonds less predictably right away, so most dentists wait before placing a definitive restoration rather than bonding immediately. And if a case shows a poorly sealed root canal, active infection, or a tooth that isn't responding after a reasonable number of sessions, the right call is to stop and reassess. Retreatment or a restorative option belongs on the table before more bleaching cycles are attempted.
How Long Results Last and What Affects the Outcome
Not every stain responds the same way. Grey discoloration from old trauma is the most predictable to treat, often lightening well within a handful of sessions. Dark yellow and metallic stains from older restorative materials are tougher, sometimes requiring more applications or a switch to a restorative option entirely.
Results generally hold up well over years, but relapse does happen. What causes it matters:
- Color relapse in the two to five year range is usually tied to restoration breakdown, not a failure of the bleaching chemistry itself
- Staining uptake from coffee, tea, or tobacco can gradually dull results over time, the same as it would on any tooth
- Keeping the final restoration intact and well-sealed is the single biggest factor in prolonging results
When a tooth doesn't respond after a reasonable course of treatment, or when relapse keeps recurring despite good maintenance, that's the signal to consider retreatment or a restorative alternative rather than repeating the same bleaching cycle indefinitely.
When to Skip Bleaching and Consider Other Options
Bleaching isn't the right call for every discolored tooth. Metallic staining from certain old restorative materials often resists bleaching entirely. A poorly sealed or infected root canal needs retreatment before any cosmetic work makes sense, and a tooth with extensive existing restoration or structural loss may simply have too little healthy tooth left to bother.
In those cases:
- Veneers cover the visible surface without touching the tooth's internal structure, useful when the stain resists bleaching but the tooth itself is otherwise sound
- Crowns suit teeth with significant structural loss, offering strength and coverage at the cost of more tooth reduction and higher long-term expense
- Root canal retreatment comes first whenever the existing canal filling shows signs of failure, regardless of how the tooth looks cosmetically
How CWD Dental Group Approaches Internal Bleaching
At CWD Dental Group, internal bleaching starts with an honest assessment of the root canal itself, not just the shade. We confirm the canal seal is sound, place the orifice barrier at the depth the evidence supports, and choose the agent based on your specific staining pattern rather than defaulting to the fastest option.
Patients working with our cosmetic dentistry team get a clear, written plan before treatment starts: expected visits, target shade, and a follow-up imaging schedule to catch any early warning signs. That's the same conservative, structure-preserving approach that guides every cosmetic case we take on, whether it's stain removal or a full smile plan.
What to Bring to Your Consultation
Before your appointment, confirm what caused the discoloration and whether you have prior radiographs showing your root canal's condition. Ask directly about the agents and barrier materials your dentist plans to use, your realistic target shade, and how costs break down with your insurance.
One more thing worth asking outright: request a written plan that spells out your radiographic follow-up timing, not just the bleaching schedule.
— Kayle
Ready to Whiten a Dark Root Canal Tooth?
CWD Dental Group treats internal bleaching the way it should be treated: as a conservative first step that preserves your natural tooth structure before crowns or veneers ever enter the conversation. If your root canal-treated tooth has darkened and you want a straight answer on whether bleaching fits your case, that's exactly the kind of evaluation our cosmetic and emergency teams handle every week in Tallahassee.

A consultation starts with a look at your existing root canal seal and a radiograph baseline, so you know before treatment begins whether bleaching, a restoration, or retreatment is the right path. From there, we walk through agent choice, expected visits, and a realistic timeline for your target shade. If you're also dealing with sensitivity or discomfort in that tooth, same-day emergency appointments mean you don't have to wait weeks just to get answers. Book your visit and get a written plan before any bleaching begins.
This article is general information, not a substitute for advice from a qualified doctor. Consult a qualified healthcare professional about your own circumstances before acting on anything here.
Sources
- INTERNAL BLEACHING: LONG-TERM OUTCOMES AND COMPLICATIONS - The Journal of the American Dental Association
- Internal Tooth Whitening - StatPearls - NCBI Bookshelf
- Internal bleaching of teeth: an analysis of 255 teeth
- Intracoronal bleaching: case series and technique discussion (PMC)